What’s in the Box? Inferring with Mystery Boxes

Inferencing is one of the comprehension skills that I enjoy teaching the most, however it is also one that students find the hardest to master. There are many possible reasons why students find it so difficult. It could be due to a lack of life experiences or sometimes it’s simply because it’s a way of thinking they aren’t often required to do. It may make me sound a bit old here.. (ok ok the internet was only just becoming mainstream when I was a teenager) but these days if a student has a question they can simply ask Siri or Alexa.

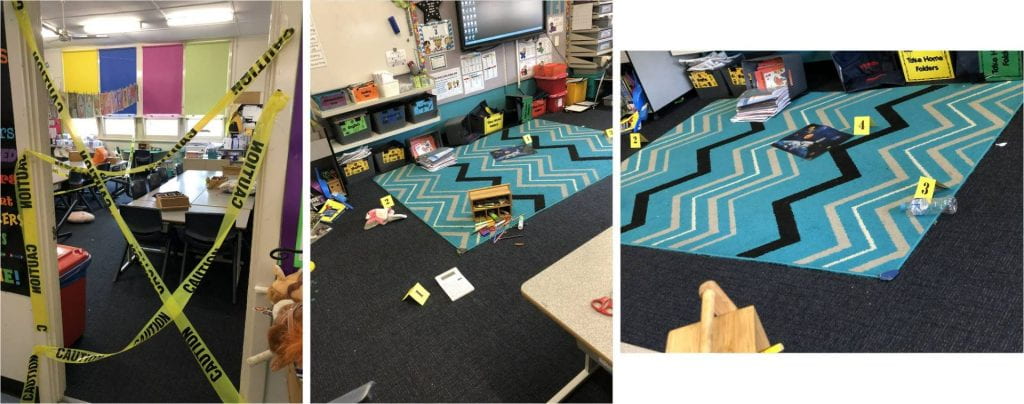
One the first things I do to peak my students interest is a classroom crime scene. I still have past students coming up to me in the yard talking about it. Super easy to set up and such fun!

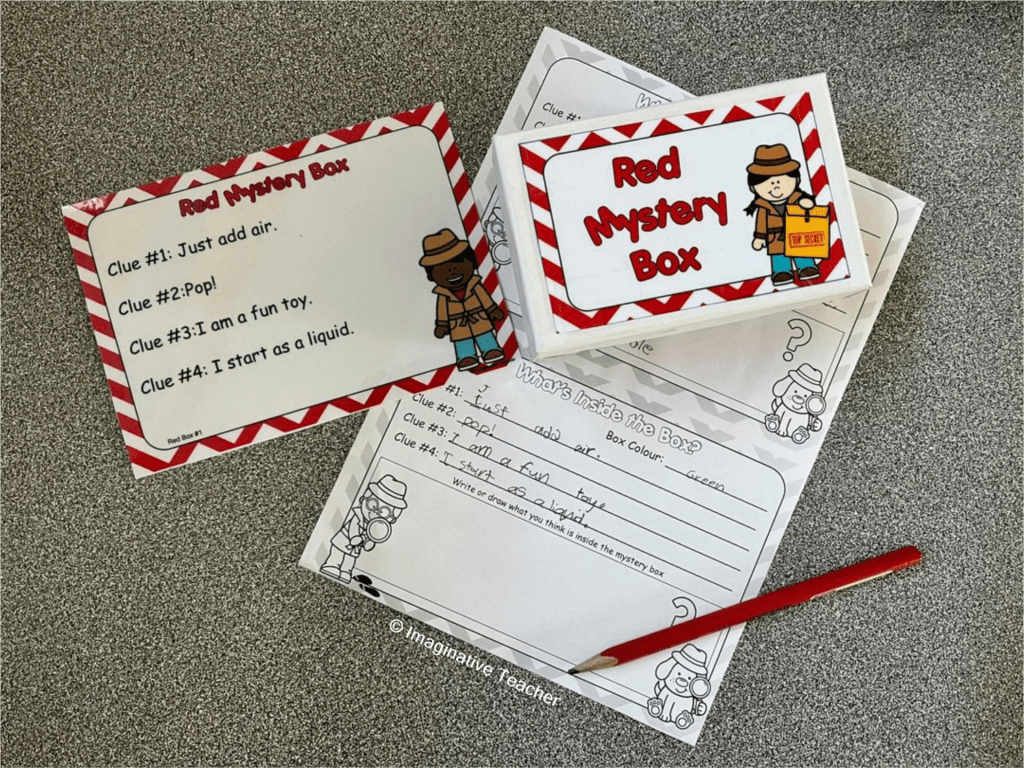
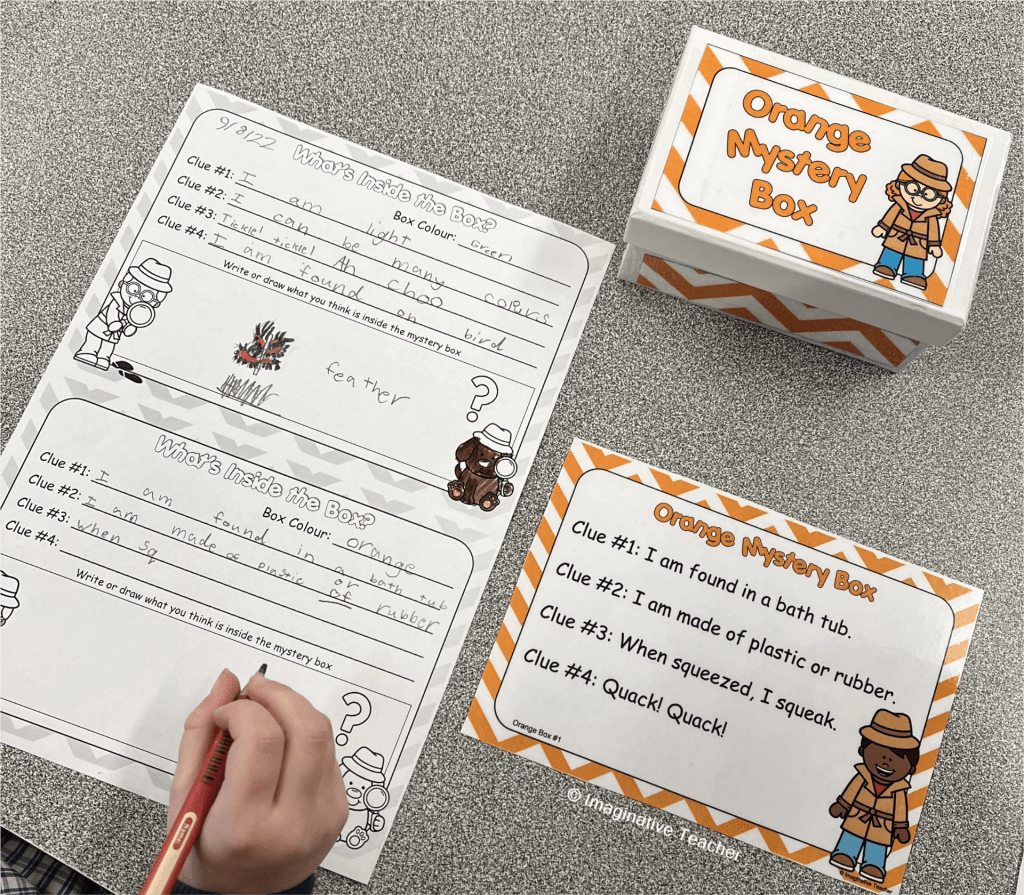
Wanting to keep the momentum going, I devised a special series of mystery boxes. Each of the 6 sets has 6 series of clues (so 36 in total!)

Simply use 6 small boxes and inside each one place an item that corresponds with the clues provided. The clues have been designed to be for items you may already own or could very easily be found at a discount store.

There are three ways to use this set.

1.  In small groups

Form students into small groups of 3 or 4, with each group given one box. Using only the clues and the ability to give the box a little shake (but not open it!), students read the clues, record each one and make an inference as to what is inside the box by drawing and writing what they believe it to be. Some of the clues are easier than others so beware! The boxes are then rotated to the next group.

Students are provided with the chance to discuss their ideas with other groups and workshop other possible answers. As a class then come back together, with students providing what they inferred was inside each box, plus justifying their answer in relation to the clues. For example, “I think there is a balloon in the box because one of the clues said ‘pop!’.“ Finally reveal the contents of each box to cheers of success and acknowledgement.

2. As a whole class.

Use the individual slides one at a time with the whole class recording the clues individually and discussing the possible options. Ask for inferences after each slide and see how student’s ideas change with each extra provided clue. The last clue is usually the give away, with the first three clues designed to have students thinking outside of the box!

3. As an independent literacy center.

Simply set up the sealed boxes, then individually have student read then record the clues before making their final inference.

Included in both US and AU/UK English, this is perfect for an interactive, engaging activity. Includes 36 different sets of clues, so this could easily be a lesson that is repeated multiple times with different answers, or simply choose the clue cards that cater to objects you already own.

Recording sheet and full answers are included.


Happy teaching!

✏️❤️ Katie


Telling Time on a Number Line!

Telling the time has always been a tricky concept for students to understand.

Often they become mixed up between the two hands – which one is the hour hand and which one is the minute hand.

Throw into that mix the fact that there are both hour numbers and minute lines around the clock face and it’s no wonder students get confused.

Well here is now another way to help students tell the time – use a number line!

It makes sense that when learning about place value, using a number line shows children the sequential numbers forwards, backwards and reinforcing the concept of skip counting.

If you take a number line from 0 to 60, bend it into a circle you have yourself a number line clock face!


I have found that using this method after teaching students about number lines has really helped them to understand the concept of increasing minutes, skip counting by increments of 5, o’clock, half past, quarter past, and quarter to.

See what a difference it will make to have a hands-on experience. It really will help make those students make connections with numbers and time.

Download the freebie below and grab your own copy so that your students can make a number line clock too.

Happy teaching!

✏️❤️ Katie

Analysing Character Traits for Kids

I try to read a story to my class every day. I’m a big fan of fairytales and the various versions each one can take. In one story, the Big Bad Wolf might eat Three Little Pigs, but in the next version the pigs take ninja training and chase the wolf. Such fun!

I discovered very quickly that students are coming to school with very little knowledge of the fairytales that our generation grew up with and loved.

When learning about narratives, it is easy to focus on the four main areas of character, setting, conflict and resolution. Often delving deeper into character traits is overlooked as it is quite tricky for some students to deeply think about the personalities of the different characters. It is important that we analyze not just who, where, what, when, problem and solution but also the characters themselves.

I usually teach narratives and character traits after out unit on adjectives, as it helps for students to be able to use broader language and express themselves rather than use boring terms such as  ‘bad’ or ‘mean’. Students become quite clever at finding new terminology and enjoy the challenge of describing each character perfectly.

To encourage deeper thinking, I’ve designed these templates to help students really think about what the characters look like on the outside and how they are on the inside, making comparisons between the main characters.

For example the Wolf and Little Red Riding Hood. They are very different characters with very different personalities but by placing them next to each other students can compare and contrast what the two characters are like both in appearance and personality.

✏️❤️ Katie

Parsing?? What’s that??

Understanding grammar and how to use grammar effectively is the foundation of the English language.

Parsing is an important skill for students to be able to do to understand the construction of sentences. This knowledge and understanding then helps for the successful construction of independent writing.

I have found that parsing is one of the trickiest concepts for my class to understand as they become a bit overwhelmed all at once (especially in the beginning!)

To combat this I created a resource that beaks it down into small bite sized chunks for practising.

This pack is designed as an independent station / centre. Sentence strips are printed, laminated for durability, cut and ringed.

Each card has a sentence which includes a noun, verb and adjective. Students need to read and parse the sentence, identifying the parts of grammar.

Two differentiated recording sheets are included:
1-10 and 11-20 (to allow more recording space)
20 sentences

An answer sheet is included. This can be used for teacher marking; or to increase student independence, provide this card after the task has been completed for students to mark their own or a partners.

Happy parsing!

✏️❤️ Katie