Cricut in the Classroom for Holidays and Special Occasions

It’s no secret that I LOVE my cricut and have been using it to great effect in the classroom for the last few years. (See my Pinterest page with my ever growing collection of personal photos here)

I’ve also been using my cricut for special occasions at school – Christmas, Mother’s Day, Easter, World Teachers Day, just to name a few! And it’s not just for gifts – it’s also been a wonderful tool for hands on activities.

Here’s just a sample of the ones I managed to get photos of.

Christmas
Snowman t-shirts for our class performance at the Christmas concert. I made every grade 2 student a snowman t-shirt (they looked soooo cute!) while the teachers had the snowmen with the hats as a point of difference.

Student baubles ready to be discovered hanging up a week before Christmas break
Ice block holders for student gifts

Named baubles for co-teachers

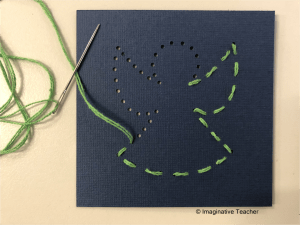
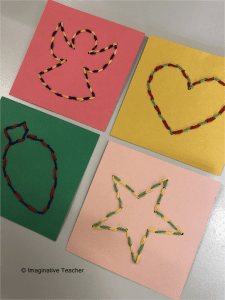
Lacing cards – I cut out both the square and many small circles in a Christmas themed pattern ready for stitching. Students used a blunt needle and wool to lace in and out. These were then stuck to the front of Christmas cards for a personalised DIY parent card. These are cards my grade 2 students made. Fantastic for fine motor skills. Gorgeous! **Hint** – the love heart templates are perfect for Mother’s Day cards too!
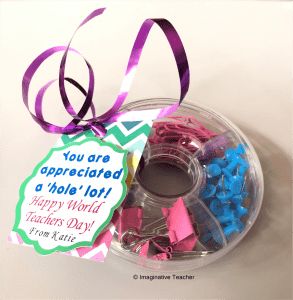
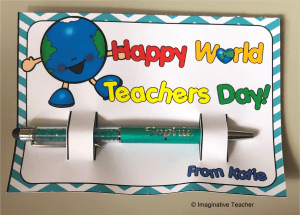
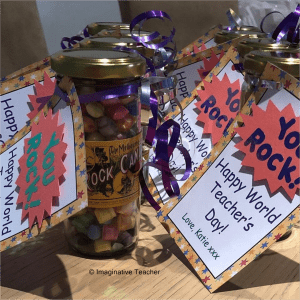
Want a copy of the free cricut pattern file that I designed? Click here!

World Teachers Day
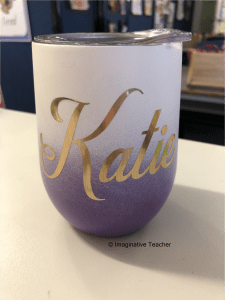
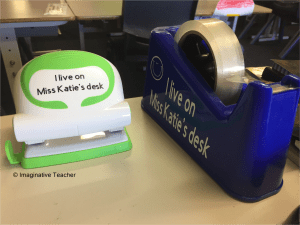
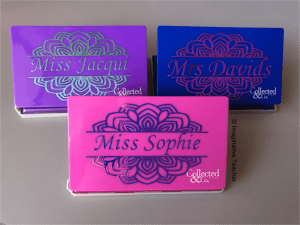
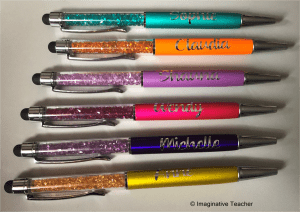
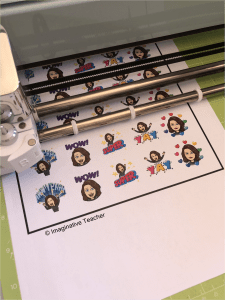
Who doesn’t love a surprise gift? Each year I make super cute personalised gifts for my co-teachers to let them know they are appreciated. Here’s a selection of what I’ve made over the years: mini stationary sets (print and cut), hole punches,  pens, candy jars, and Bitmoji stickers with the a picture of the recipient (print and cut).
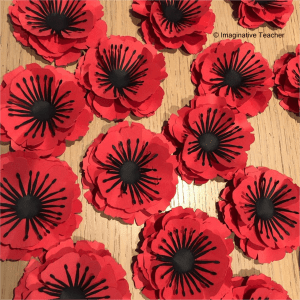
Remembrance Day
Wearing a poppy is an important symbol of respect and reverence. Each year I make gorgeous poppies for my teaching team to attach to their shirts with a safety pin.
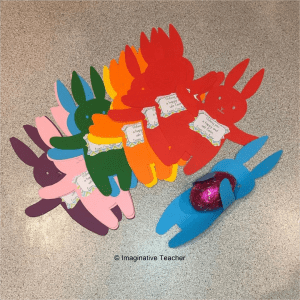
Easter
Bunnies! I love these little bunny huggers! Wrap one around a mini egg and leave on student desks as a surprise. This was a free download from Lia Griffith (click here for the freebie link!)


Want to pin this page for later?

I’d love to know how you use your cricut for special occasions! Happy cricut-ing!

✏️❤️ Katie

Cricut In The Classroom

For Christmas of 2017 my lovely parents-in-law generously gave me a Cricut machine. My mother-in-law also bought one for herself at the same time and as we both unleashed our inner creativity, it was something we really bonded over.  It took me a good 12 months to really become comfortable and start making lots of things. Now I can’t stop!

I really love using it for my classroom. It makes everything so much easier, quicker and neater. I thought I might throw out a few ideas and see if I can inspire you to get creative too.


First things first – my day starts with a hot cup of tea.


Before entering the classroom – a challenge at the door!


An inspirational quote at the classroom door (all letters individually cut out).


Notebook covers with personalised monograms.


Labeling my Ikea furniture


Ensuring your school supplies stay where you need them to.


A cute trolley to help keep all my loose paperwork organised! I also use it for my guided reading groups with the week’s texts in the top tray, mini whiteboards in the middle tray and boxes of magnetic letters in the lower tray for my low group.


A back to school first-day gift – personalised bookmarks.


A birthday chart – The print and cut feature was used for the header images and reverse weeding was used for the title and months. Photos of the students holding up the numbered date of their birthday will be posted underneath each month.


Recording the date on the board each day becomes easy with a template.


A display that lights up when the student Star of the Day is ready to do their jobs (ie take the roll, organise lunch orders etc) This is used as a visual indicator to other students that they need to come to the floor to start the morning admin. Saves me using my voice! (Star light purchased at Kmart)


A special seat for the Star of the Day to use.


Helping students to understand noise expectations.
Adhesive vinyl stuck onto tap lights.


Assisting with yard clean up – labelled buckets and tongs with adhesive vinyl.


Finally, the Principal asked me to ‘freshen up’ the female staff bathrooms. This was the end result: The main wall display and two toilet doors.


Want to pin this page for later?


As I create new ideas, I’ll post them on my Pinterest board. Follow my board here

I’d love to hear your ideas of how you use your Cricut / Silhouette machine to help your teaching or to decorate the classroom!

✏️❤️ Katie

Open Night – A room filled with smiles

Meet the Teacher Night (or Open Night / Acquaintance Night as my school used to call it) is a big deal. Parents come and meet you, check out the classroom and want to hear all about your teaching attitude/philosophy. I always feel like I need to be on point and my room needs to be above and beyond neat and tidy.

I always get a bit nervous before the parents come in. Will I ramble on and forget what I was going to say? Will I make a good enough impression? Will parents understand how much their child means to me? The reality is – parents just want to say hi and see where their child spends most of their day. I always get to the end of the night and think ‘That was actually pretty good. What was I stressing for?’

One thing I do every year that is a HUGE hit with parents and visitors, is to have the students create portraits of themselves and then attach them to the backs of their chairs. It fills the room with fun and makes it appear to make a class full of smiling faces. My students love it too as it gives them a chance to be creative and show their individual personalities.


HINT* Stick a ruler on the back of each portrait to keep them upright.

When the night is over, I print off student names, attach them to the bottom of each portrait and display them in the classroom entrance for the remainder of the year. Lots of smiling faces to welcome all future visitors.

If you’d like a copy of the free display so you can make your own, just click on the picture below.


Enjoy!

✏️❤️ Katie

Making student weekly reflection FUN!

Teaching year 2, I was after a fun way for students to reflect upon their week without being the usual boring ‘what I did this week’ kind of scenario. (I’m sure you understand what I mean)! After talking with a colleague, I came up with this design and my kiddos LOVE it – even to the point of asking to do it!


Here’s how it works:

Each student is presented with a half book (a notebook chopped in half).


Every Friday I print out a different and that afternoon I verbally review each of the week’s questions/statements with the class. Together we brainstorm a few possible answers. This helps to avoid any students from saying ‘ I don’t know what to write’.

After a set amount of time, students are then provided the opportunity to turn to their seated partner and share what they have written. The books are then stored in a small basket at the front of the room, ready for the following week. It genuinely only takes about 15 minutes but it’s a wonderful way for students to independently reflect, do a bit of creative thinking and then share these thoughts verbally with a partner.

The parent feedback I’ve had from this has been wonderful! Students love to take their books home at the end of each term and share their ideas with their family.

After a few weeks, you’ll begin to notice that students get really creative with their answers. For example, when we first started with Friday 3-2-1, to the statement ‘1 thing I wish had been in my lunchbox this week’ I was receiving answers such as ‘chocolate bar’ or ‘candy’ and now the answers are as diverse as ‘a unicorn’ or ‘a note from my mum’. Students really do begin to think differently when given the chance. After a while, students even begin to suggest their own 3-2-1 statements.

If you’d like a copy of this resource, just click the image below. The resource includes 26 different prefilled pages (plus an extra duplicated page to cater to the regional spelling of favourite/favorite) along with a blank template so you can print and write your own.

✏️❤️ Katie